


Introduction
In my previous article, we walked through installing Microsoft Foundry Local and running the powerful Phi-3.5 model completely offline. It was a great first step into local AI.
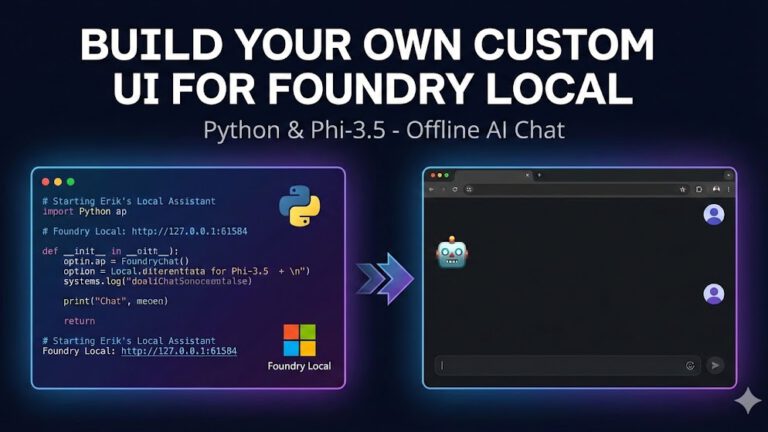
But let’s be honest: chatting with an AI inside a terminal window doesn’t feel very futuristic. In this tutorial, we will build exactly what you need: A custom UI for Foundry Local that runs entirely on your machine.
In this tutorial, we will build exactly that. We are going to create a „Local AI Assistant“ using:
- Foundry Local (The Engine)
- Python & FastAPI (The Middleware)
- HTML/JS (The Frontend)
The best part? I’ve written a script that handles the trickiest part of Foundry Local: Automatic Port Detection.
How It Works
Before we write code, let’s understand the architecture.
- The Brain: Foundry Local runs the AI model (Phi-3.5). It exposes an API, but the port changes every time you restart it (e.g.,
127.0.0.1:61584). - The Bridge (Backend): Our Python script finds the correct port automatically and acts as a stable API server.
- The Face (Frontend): A simple
index.htmlfile that talks to our Python backend to display messages.
Prerequisites
- Foundry Local installed (See my previous guide if you haven’t done this).
- Python 3.8+ installed.
- The code for this project (we will clone it below).
Step 1: Get the Code
I have prepared a complete repository with everything you need. You don’t need to write the code from scratch.
Open your terminal or command prompt and clone the repository:
git clone https://github.com/erik8989/Local-AI-assistant-w-Frontend.git
cd Local-AI-assistant-w-FrontendInside, you will find three main files:
main.py: The brain of the operation.index.html: The user interface.requirements.txt: The necessary libraries.
Step 2: Install Dependencies
We need a few Python libraries to run the server. Specifically, we need FastAPI (for the web server) and httpx (to talk to Foundry).
Run this command:
pip install -r requirements.txt(Or manually: pip install fastapi uvicorn httpx pydantic)
Step 3: Start Foundry Local
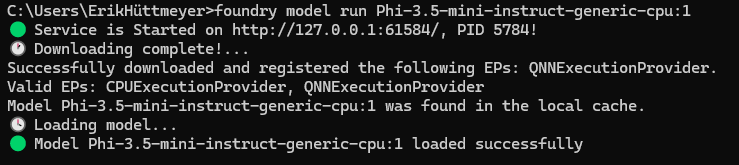
Before we launch our app, the AI engine needs to be running. Open a new terminal window and start the Foundry service:
foundry model run Phi-3.5-mini-instruct-generic-cpu:1Note: The first time you run this, it will download the model (~2-3 GB). Grab a coffee! ☕
After that it should look like that
Step 4: Start the Assistant (The Magic Part)
This is where my script shines. Usually, you would have to manually copy the Port Number from Foundry and paste it into your code. But my main.py includes an auto-discovery feature.
Run the backend:
python main.pyThe script automatically hunted down the running Foundry service and connected to it!
🚀 Starting Erik's Local Assistant API Server
✅ Found Foundry Local on port 61584
📍 Foundry Local: http://127.0.0.1:61584
🤖 Default Model: Phi-3.5-mini-instruct-generic-cpu:1
🖥️ Server: http://localhost:8000Step 5: Chat!
Now for the fun part.
- Go to the folder where you downloaded the files.
- Double-click
index.html(or open it in your browser). - Type „Hello“ and hit Enter.
You now have a fully functional, dark-themed AI chat interface.


Features of this UI:
- Conversation History: It remembers the last few messages for context.
- Responsive: Works on mobile and desktop.
- Configurable: You can easily change the „Assistant Name“ or colors in the
index.htmlfile.
Customization Tips
Want to tweak the experience?
1. Change the Creativity (Temperature): Open main.py and look for:
TEMPERATURE = 0.7 # 0.0 is strict, 1.0 is creative2. Change the Interface: Open index.html and look for the CONFIG object at the top of the script. You can rename the bot to „Jarvis“ or change the emojis instantly.
Conclusion
Running AI locally gives you privacy, but it often lacks a good user experience. By combining Foundry Local with a lightweight Python backend, we’ve bridged that gap.
Now you have a foundation to build even more complex tools—like a document summarizer or a coding assistant—that runs entirely on your machine.
Check out the full code on GitHub here: Local-AI-assistant-w-Frontend
Let me know in the comments if you get it running! Happy coding!