


Introduction
Managing user accounts manually in Microsoft Entra can quickly become tedious and error-prone, especially when it comes to disabling inactive users. Thankfully, you can easily automate this task by creating an Azure Function to Deactivate Inactive Users. This guide provides a beginner-friendly, step-by-step approach to automating user management in Microsoft Entra using Azure Functions and PowerShell. By following this process, you’ll maintain a secure, efficient, and cost-effective identity management system.
Why Use an Azure Function to Deactivate Inactive Users?
Inactive accounts pose security risks, compliance issues, and unnecessary licensing costs. Automating their management offers several significant benefits:
- Enhanced Security: Automatically disabling inactive users significantly reduces potential entry points for unauthorized access and security breaches.
- Cost Efficiency: Deactivating unused accounts frees up software licenses, enabling your organization to optimize costs.
- Time-Saving: Automation eliminates manual, repetitive administrative tasks, allowing your IT staff to focus on higher-value projects.
- Compliance: Automatically managing inactive accounts helps your organization meet regulatory requirements and industry best practices.
- Scalability: Easily manage user accounts across large or growing organizations without increasing administrative overhead.
Step 1: Choose the Right Azure Function Hosting Plan
Azure provides several hosting plans for Function Apps. Each plan has distinct features suitable for different use cases:
| Hosting Plan | Scale to Zero | Scaling Behavior | Virtual Network | Dedicated Compute | Max Instances |
|---|---|---|---|---|---|
| Consumption | ✅ Yes | Event-driven | ❌ No | ❌ No | 200 |
| Premium | ❌ No | Event-driven | ✅ Yes | Minimum 1 | 100 |
| Flex Consumption | ✅ Yes | Fast Event-driven | ✅ Yes | Optional | 1000 |
| App Service | ❌ No | Metrics-based | ✅ Yes | Minimum 1 | 30 |
| Container Apps | ✅ Yes | Event-driven (KEDA) | ✅ Yes | Optional | 300 |
Recommended Plan
For automating the deactivation of inactive users, the Consumption Plan is highly recommended due to:
- Automatic and efficient scaling based on workload.
- Cost-effectiveness for scheduled tasks.
- Billing occurs only when the function is active.
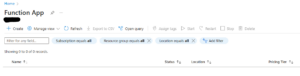
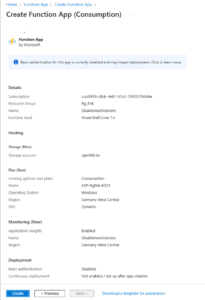
Step 2: Create an Azure Function App
Follow these detailed steps to create your Azure Function App:
- Navigate to the Azure Portal.
- Click Create a resource and search for Function App.
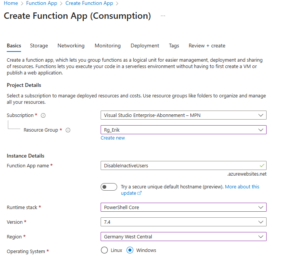
- Click Create, then enter the following configuration details:
- Subscription: Choose your Azure subscription.
- Resource Group: Select or create a resource group.
- Function App Name: Choose a unique, descriptive name (e.g.,
DisableInactiveUsers). - Region: Choose a location nearest to your primary users.
- Runtime stack: Select PowerShell Core.
- Operating System: Choose Windows.
- Plan Type: Select Consumption (Pay-as-you-go).
- Click Review + Create, verify your settings, then click Create.
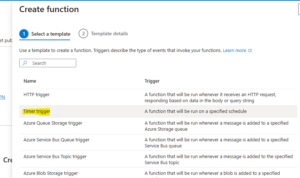
Step 3: Add a Timer Trigger Function
To automate your Azure Function, create a Timer Trigger:
- In your Function App, click Functions, then click Create.
- Choose Timer Trigger.
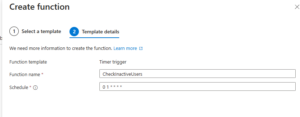
- Provide a clear name (e.g.,
CheckInactiveUsers). - Configure a CRON expression for scheduling (e.g., daily at 01:00 AM:
0 0 1 * * *). - Click Create to set up your Timer Trigger.
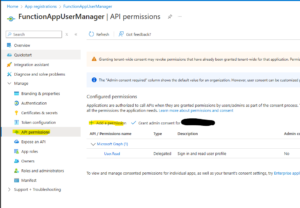
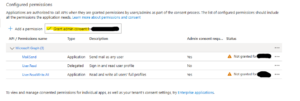
Step 4: Configure Microsoft Entra Permissions
To allow your Azure Function to manage users, configure Microsoft Entra permissions:
- Navigate to Microsoft Entra ID → App registrations → New registration.
- Provide a name, such as
AzureFunctionUserManagement. - In API permissions, add the following Application permissions:
User.ReadWrite.AllMail.SendAuditLog.Read.AllDirectory.Read.All
- Click Grant admin consent.
- Generate a Client Secret and store it securely.
Note: Certificate-based authentication is significantly more secure than using a client secret. We’ll explore certificate-based authentication in detail in a future guide.
Step 5: Securely Store Environment Variables
Securely store credentials within your Azure Function settings:
- Open your Function App in the Azure Portal.
- Navigate to Environment Variables under Settings.
- Click + Add and enter these values:
TenantId = "your-tenant-id"
ClientId = "your-client-id"
ClientSecret = "your-client-secret"
Click Save to securely apply these settings.
Accessing Environment Variables in the Script
In your PowerShell script, reference these environment variables as follows:
$TenantId = $env:TenantId
$ClientId = $env:ClientId
$ClientSecret = $env:ClientSecret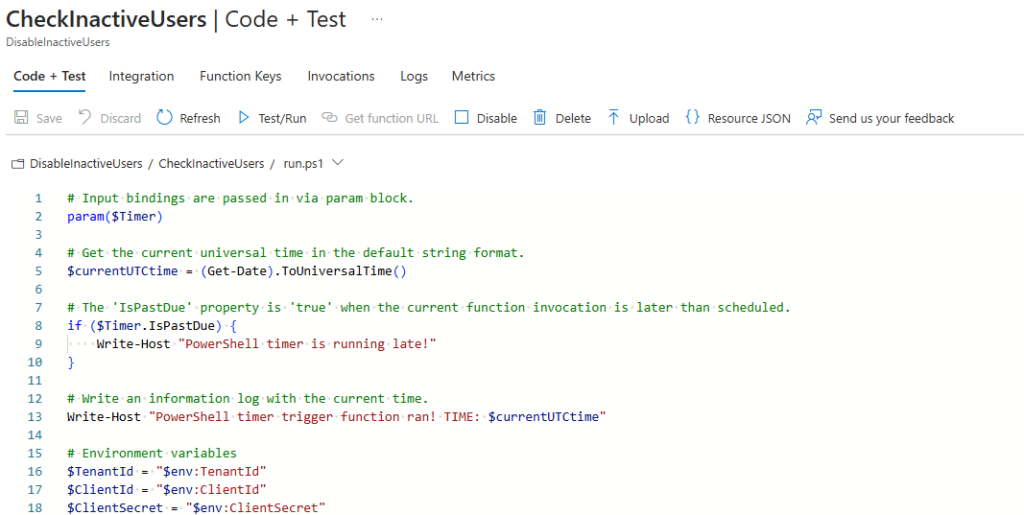
Step 6: Deploy and Run the PowerShell Script
The comprehensive PowerShell script needed for automation is available here:
Highlights of the PowerShell Script:
- Connects to Microsoft Graph API to retrieve user activity.
- Automatically identifies and disables inactive user accounts.
- Sends administrative notifications via email.
- Provides robust error handling and logging.
Step 7: Test Your Azure Function
Perform a test run to ensure your function works correctly:
- Select your Timer Trigger function in the Functions menu.
- Open Code + Test.
- Click Test/Run, followed by Run.
- Monitor logs to confirm successful execution and accurate identification of inactive users.
Conclusion
You’ve successfully established an efficient and secure automated solution by setting up an Azure Function to Deactivate Inactive Users. This approach optimizes your Microsoft Entra environment, enhances security, reduces administrative overhead, and supports compliance.
🚀 Take the next step in automating your Microsoft Entra environment securely and efficiently!