


Exchange Online is continually evolving, providing more granular security controls. One crucial area I often find overlooked is securing Microsoft Graph API permissions like Mail.Send or Mail.Read. By default, applications registered in Microsoft Entra ID might have access to every mailbox within an organization. This poses significant security and compliance risks. Implementing RBAC in Exchange Online ensures applications access only the mailboxes they genuinely require, significantly enhancing organizational security.
This guide complements my previously published article, Secure Mailbox Access with Microsoft Graph and Entra ID, where I’ve shared a script to automate and secure dynamic app registrations. You can access the PowerShell script on GitHub. Please note: I’ll update this script soon to align with RBAC best practices described here.
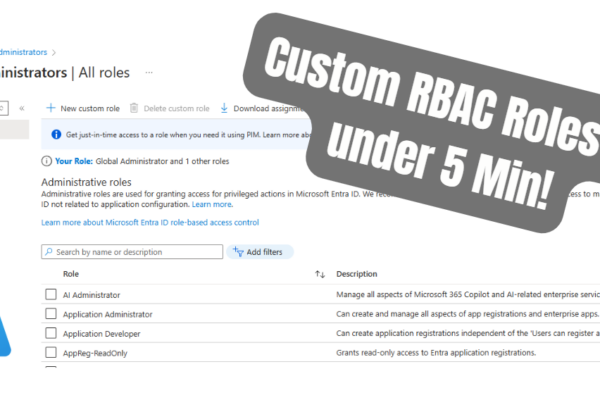
Why RBAC in Exchange Online Matters
Previously, I used Application Access Policies to manage application access. However, these lacked flexibility and fine-grained control. RBAC in Exchange Online solves this problem, allowing precise permission assignments and improved scalability. This ensures applications leveraging Microsoft Graph API have clearly defined and appropriate mailbox access.
Step 1: Register Your Application in Microsoft Entra ID
I start by registering my application in Microsoft Entra ID:
- Log into the Microsoft Entra admin center.
- Click „App registrations“ and „New registration“.
- Enter the application name, choose account types, and register.
- Save the Application (client) ID and Directory (tenant) ID for later use.
These IDs are crucial when configuring RBAC in Exchange Online.
Step 2: Assign API Permissions to the Application
Next, I assign the required API permissions to the registered application:
- Open the app registration, select „API permissions“.
- Click „Add a permission“, choose Microsoft Graph, and select „Application permissions“.
- Select permissions such as Mail.Read, Mail.ReadWrite, or Mail.Send.
- Grant admin consent for these permissions.
Proper permissions ensure RBAC effectively secures mailbox access.
Step 3: Create a Service Principal in Exchange Online
Connecting to Exchange Online via PowerShell, I create a service principal:
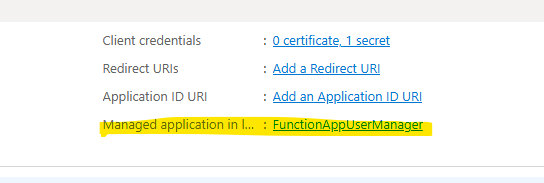
To obtain your application’s Object ID, follow these steps:
- Navigate to the Microsoft Entra admin center.
- Select „App registrations“.
- Open your application’s registration.
- Click on „Managed application in local directory“ (this link might be at the bottom of the Overview page).
- Copy the „Object ID“ displayed on this page.
Connect-ExchangeOnline

New-ServicePrincipal -AppId "Your_Application_ID" -ObjectId "Your_Object_ID" -DisplayName "Your_Application_Name"
Replace the placeholders with your application’s details to link it effectively to Exchange RBAC.

Step 4: Define a Management Scope (Recommended)
RBAC in Exchange Online allows creating management scopes to limit mailbox access:
New-ManagementScope -Name "LimitedScope" -RecipientRestrictionFilter {RecipientTypeDetails -eq "SharedMailbox"}Scopes add an extra security layer by restricting access to specific mailboxes. You can choose between the different RecipientTypes, Attributes, User etc.
Check out the Filterable Properties
In this Example the Scope goes to every UserMailbox. So the Application can send from every User Mailbox but can not send from Shared Mailboxes

In that example I am filtering to specific Mail Alias. So you see you can do pretty much with Exchange RBAC for Applications.
New-ManagementScope -Name "Limited Scope User" -RecipientRestrictionFilter {Alias -eq "Allowed_User"}
Step 5: Assign RBAC Role to Your Application
I assign the appropriate RBAC role with the defined scope:
New-ManagementRoleAssignment -Role "Application Mail.ReadWrite" -App "Your_Application_ID" -CustomResourceScope "LimitedScope"Always use the -CustomResourceScope parameter to prevent unintended tenant-wide access.

Step 6: Test and Validate Your RBAC Configuration
Always validate your RBAC configuration:
Test-ServicePrincipalAuthorization -Identity "Your_Application_ID" -Resource "mailbox@domain.com"
A successful validation confirms your RBAC configuration is accurate and secure.
Best Practices for Managing RBAC in Exchange Online
From my experience, these best practices ensure optimal RBAC security:
- Minimal Permissions: Provide only the necessary permissions.
- Clear Documentation: Keep detailed documentation of RBAC setups.
- Regular Audits: Periodically review RBAC permissions for compliance and accuracy.
Conclusion
Implementing RBAC in Exchange Online is essential for securely managing Microsoft Graph API access, ensuring precise mailbox permissions, and enhancing overall security posture. This approach, complemented by my script and previous article, offers a comprehensive solution for robust security and compliance.
For more details, check the official Microsoft documentation.